How to integrate “Ad Mediator” in your apps?
“ Microsoft Ad Mediator ”, recently released by Microsoft to maximize your ad monetization – we already talked about it last day. If you don...- Article authored by Kunal Chowdhury on .
 “Microsoft Ad Mediator”, recently released by Microsoft to maximize your ad monetization – we already talked about it last day. If you don’t know about it, read the said post, download the Visual Studio 2013 extension before continuing with this post.
Today, we will discuss how to integrate “Ad Mediator” in your Windows Store and Windows Phone applications. As it currently supports only Windows Phone apps, so we will continue with that.
Once you install the “Ad Mediator” plugin extension for Visual Studio 2013, you will see a new context menu item in your Windows Phone app project named “Connected Service”. This opens the Services Manager window where you can find the Ad Mediator section to add/configure your ad networks.
To do this, right click on your Windows Phone application project, navigate to “Add” – “Connected Service…” as shown in the below screenshot:
")
At the first, it will search for all the ad network instances installed in your project and load them in this screen. By default, it loads the “Microsoft Advertising” network.
")
Once it loads the ad network instances, it shows the name of the ad network, status of fetching the DLLs from NuGet and the required Capabilities. Below you can see that, “Microsoft Advertising” requires 5 (five) capabilities named “ID_CAP_IDENTITY_USER”, “ID_CAP_MEDIALIB_PHOTO”, “ID_CAP_PHONEDIALER”, “ID_CAP_NETWORKING” and “ID_CAP_WEBBROWSERCOMPONENT”. This can be different for other networks. Make sure to add the capabilities in your manifest file.
")
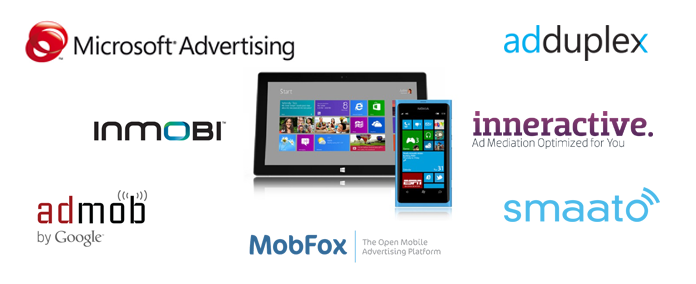
You can add more ad networks in this screen. Click the “Select ad networks” link as shown above to open the “Select Ad Providers” dialog window. If you want to remove any ad network, you can select the same link and from the next screen you can remove them. Currently only 7 (seven) ad networks are supported by Ad Mediator. Remember that, all networks does not support all types of projects. To know more about the supported ad providers, read my next post.
")
Once the Ad Mediator plugin adds the selected ad network in your project by fetching the required DLLs from the NuGet, it will show the success message. In case it fails to download, it will mark them red in the same screen. If fails, you have to download and link the said DLLs from the ad provider’s website. Rest will be done by the plugin.
")
As shown below, you can check the installed ad networks and their respective required capabilities in the Service Manager. Make sure to do the manual changes in the manifest file of your app to include the said capabilities.
")
Another important thing that you notice after fetching any ad network in ad mediator is the .config files and the DLL references. You will notice two new .config files in your project: AdMediator.config and packages.config. First one is required by the Ad Mediator to know details about the ad network that you selected. We will discuss more about it later half of this post. The second file is required by the NuGet package manager to know more about the packages installed in the project.
")
")
You can see a no. of additional DLL references added to your project. This could be more or less depending on the selected ad networks.
The next step is to configure each networks to know more about your apps. You must have to create app specific applications on the respective ad networks website and grab the additional property values required by the control. Though this step is optional here, but require for you to test your apps in emulator and/or physical device before submitting it to Dev Center. Once you publish your app, you can directly configure them in your Dev Center account without rebuilding your apps.
")
To get started with configuring the network to test in your app, select the network in the Ad Mediator Service Manager screen and click the “Configure” link at the right side of the panel (as shown above). A new dialog box named “Configure AdDuplex” will popup in the screen as shown below:
")
As mentioned earlier, this screen varies for different network. For “Ad Duplex”, it asks for “App ID”. But for others, it could be different. In my next post about Ad Mediator, I will more precisely discuss about these.
Next step is to add the Ad Mediator control in your apps XAML page. First you will need to add the XMLNS namespace and then the control in your page. Here is the XMLNS namespace declaration:
xmlns:adMediator="clr-namespace:Microsoft.AdMediator.WindowsPhone8;assembly=Microsoft.AdMediator.WindowsPhone8"
The next step is to add the Ad Mediator control in the XAML page, define a name to it and also an ID. This will help you to find the specific ad in your Dev Center account for you to track. Following is a code snippet of the Ad Mediator control, but it is advisable to drag and drop the control from the toolbox. This will ensure that you have a different name and ID for each control.

That’s all! Now build your application and deploy it in your emulator and/or physical device to test the ads coming up in your phone screen. It might take some time to see the first ad in your device, assuming you have configured the applications properly in the respective sites and added the required properties in Ad Mediator config.
I hope you liked the article. Please share this in your network and let the other developers know about it. Connect with me over Twitter, Facebook and/or Google+ to get the updates that I share over those networks. Subscribe to my blog’s RSS feed and Email Newsletter to get the email notifications directly delivered to your inbox. Stay tuned for the next blog post.
Thank you for visiting our website!
We value your engagement and would love to hear your thoughts. Don't forget to leave a comment below to share your feedback, opinions, or questions.
We believe in fostering an interactive and inclusive community, and your comments play a crucial role in creating that environment.