Web

Showing posts with label Web. Show all posts

image6[4]

Visual Studio LightSwitch is a new tool for building data-driven Silverlight Application using Visual Studio IDE. It automatically generates the User Interface for a DataSource without writing any code. You can write a small amount of code also to meet your requirement.
 

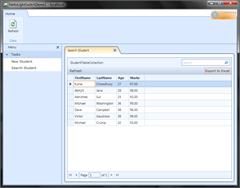
In my previous chapter “Beginners Guide to Visual Studio LightSwitch (Part – 2)”, I described you how to create a search record window & export the records to Excel Sheet using Visual Studio LightSwitch for Silverlight. I also demonstrated about sorting and navigating records without writing a single line of code.


In this chapter, I will guide you step-by-step to create a DataGrid of records. Here you will know, how to insert/modify/delete records. These all steps are without writing any code. We will use just the tool to improve our existing application. Read more to Learn about it.

Published by on under LightSwitch | LightSwitchTutorial

image

I have seen people writing Code Behind a lot while they are working in the MVVM framework. A huge lines of code in their xaml.cs file actually creates problem to the designers to change anything present in the XAML. Why is this so? Because, lots of people don’t know how to use Triggers to call the MVVM methods to complete their business need.


Michael Washington has a nice article on DataTrigger to reduce the Code behind file. It definitely reduces the problem of MVVM that world faces generally. Also, we need to do some additional things to reduce the code behind.


In this article, I will show you how to fire Triggers to call some methods present in your ViewModel, instead of writing in the code behind file. Read more to learn about it.

Published by on under MVVM | Silverlight

imageVisual Studio LightSwitch is a new tool for building data-driven Silverlight Application using Visual Studio IDE. It automatically generates the User Interface for a DataSource without writing any code. You can write a small amount of code also to meet your requirement.


In my previous Chapter “Beginners Guide to Visual Studio LightSwitch (Part–1)” I described about LightSwitch and did demonstration from creating a new LightSwitch project to create a simple form to insert new Student record.


In this article, I will show you how to create a search record window & export the records to Excel Sheet using Visual Studio LightSwitch for Silverlight. No need to write a single piece of code, no need to write a single XAML code. Read through the complete article to learn more about it.

Published by on under LightSwitch | LightSwitchTutorial

In all of my earlier articles on Silverlight Out-of-Browser (OOB) applications, I demonstrated you creating the OOB application using Visual Studio. There are plenty of steps you have to follow there. Today I found another way to change the settings for it.


image


In this post, I am going to discuss about both the processes and at the end tell me which one is best & simple.

Published by on under ExpressionBlend | Silverlight

Are you looking for a Silverlight Child Window, which can’t move from it’s actual position? Then this article will help you to understand & create a non-movable child window in Silverlight.


Child Window is available inside the System.Windows.Controls.dll assembly. By default, it is movable. You can drag the Title Bar of the Window and position it anywhere in the screen. But, you may face some situation when you need to fix the position of the Window by restricting the user to drag it. So, how will you do this?


In this article, I will show you the simplest mechanism to make your child window not movable.

Published by on under Silverlight | SilverlightTips
imageVisual Studio LightSwitch is a new tool for building data-driven Silverlight Application using Visual Studio IDE. It automatically generates the User Interface for a DataSource without writing any code. You can write a small amount of code also to meet your requirement.
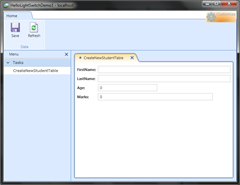
Recently, I got some time to explore Visual Studio LightSwitch. I created a small DB application with proper data inserting UI within a small amount of time (without any XAML or C# code).

Here in this article, I will guide you to understand it with the help of a small application. There will be a series of articles on this topic regularly. Read the complete article to learn about creating a Silverlight data driven application with the help of Visual Studio LightSwitch.
Published by on under LightSwitch | LightSwitchTutorial

In this small Tips & Tricks, I will guide you changing the Style of Caret of a Silverlight TextBox control. It is very simple and you can easily do it using Visual Studio or Expression Blend. Here is a screenshot of the same:

image

In general, styling the caret is not require. But in some cases, you may need to change it to give your UI the look & feel of your entire application.

Published by on under .Net | Silverlight

Did you ever want to run an application from your local resource inside your HTML page? If so, you will face some issues. It will never run any application from local resource directly. It may ask you to download the file before running it. This is due to browser security issue as the code runs inside the browser sandbox.


So, what to do for this? In this post, I will describe you the steps resolve to do this. Read the complete post in order to learn the same.

Published by on under Tips | Web

Recently, I wanted to detect the Silverlight version for one of my on going R&D. I wanted to detect the version from batch file and depending upon that I wanted to execute one file. Searching over internet I came to know that, HTML Application has some additional power for execution of any local file as it runs under fully trusted mode. I did more research on HTA files and successfully completed my basic analysis.


Here I will demonstrate you the process of detecting the Silverlight installation status using JavaScript from the .hta file. Read it and at the end, if you have any suggestion to improve the steps, please let me know.

Published by on under .Net | Silverlight

In my previous post “Introduction to Shapes in Silverlight 4” I introduced you with various types of Shapes available in Silverlight 4 and informed you that, I will post an article describing each one of them and here it is.


In this article, I am going to describe you about each shapes and the process to add them in our application (whenever you need). This article is for the Beginners, who don’t know much about the shape controls. If you have any suggestions/concerns please use the feedback section to let me know.

Published by on under .Net | ExpressionBlend

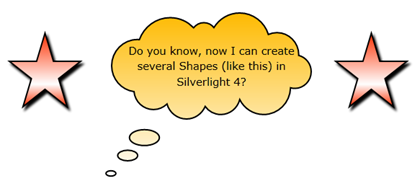
In earlier versions of Silverlight, there are very few shape controls like Rectangle, Ellipse available. But think on creating other shapes like Triangle, Polygon, Ring etc. If you need one of them in the earlier Silverlight version, how will you implement them? In my next article, I will describe about all these to you.image


I think many of you know about these. But those who are not familiar with this, I am contributing it for them.

Published by on under .Net | ExpressionBlend

imageFirst of all, a Big Thanks to all my readers who continuously supported me during last six months by voting my articles in CodeProject. I also appreciate you for your regular feedbacks and suggestions to improve. I tried my level best to answer your queries in each article’s page.


Here, I am consolidating all the articles that I posted in my Blog and CodeProject for your further reference.

Published by on under Archives | CodeProject

In my last two articles on MEF i.e. “First Guide to MEF & Silverlight (Part - I)” and “First Guide to MEF & Silverlight (Part - II)” I described about the framework with the help of a Console Application and a Silverlight Application. Hope that gave you basic idea on it and what this MEF does.


In this article I will try to give you more knowledge on MEF & it’s benefit. This time, I will again use a Console Application which will give more visibility to the underlying scenarios. Hope, like the previous articles this will also help you to understand the framework better to use it in your future need.

Published by on under .Net | C# 4.0

In my previous article “First Guide to MEF & Silverlight (Part–I)” I discussed about MEF with a small simple console application. Hope that was useful to you to understand the basic knowledge of MEF. In this article, I will guide you to create a simple Silverlight application using the MEF. If you are new to MEF, I strongly recommend you to read my previous article to gain knowledge on the basic things of MEF like Importing, Exporting, Catalog, Container etc.


Read the complete article and at the end if you have any queries, please let me know. I will try to answer them as soon as possible. Always Appreciate your valuable feedbacks.

Published by on under .Net | C# 4.0

Visual Studio LightSwitch is a new tool for building data-driven application in Visual Studio IDE. It automatically generates the User Interface for a DataSource without writing any code.


image


Microsoft released their first Beta of Visual Studio LightSwitch for the MSDN Subscribers. If you are a MSDN Subscriber, download it from the MSDN Subscriber Downloads Page. The expected date for the public release will be on Monday, 23rd August. Visit the Visual Studio Light Switch Blog for more information on it.

Published by on under LightSwitch | News

MEF is a framework to extend your application and was introduced in .Net Framework 4.0 and Silverlight 4.0. Recently I got a chance to look around the MEF with Silverlight. I found it useful in various scenarios and thus thought to do something with MEF in Silverlight.


In this article I will first discuss little about the MEF framework to give you some basic knowledge on it and then will show you how to create a small HelloMEFWorld console application step-by-step. In the next article I will use it in a Silverlight application & showcase you the feature and functionality. Read through the whole article and use this extender in your application if you need. Don’t forget to share your feedbacks and suggestions as this helps me improve my articles in greater details and present more to you.

Published by on under .Net | C# 4.0

In this Tips&Tricks, I will describe about changing the location of the output of your Silverlight application i.e. the .XAP file from it’s original “ClientBin” location to a different place. Developers sometimes need to put the XAP file in a specific directory based on their requirement. This trick will help them relocating the XAP file.


Read the full post & if you have any queries or suggestions, please let me know. Appreciate your feedbacks.

Published by on under .Net | Silverlight

In my earlier three chapters of Silverlight Tutorial, I described about “Introduction to Silverlight”, “Introduction to Silverlight Application Development” and “Introduction to Panels”. I got lots of responses & wishes from my readers for the next chapter. I know, there was a big gap between these chapters and I am really apologizing to you. Thank you for your passion. Hope, this time also I will get more responses from you. Read the complete tutorial and provide your valuable feedbacks. You suggestions/comments are highly appreciated.


In this Chapter, I will describe you about some of the most common controls used in Silverlight. After the end of this section, you will be able to understand about those basic controls and their uses. Here I will guide you to understand some of the properties of each control and how to set them from both XAML & Code behind C# file.

Published by on under .Net | Silverlight

I was working with WPF/Silverlight since March 2008 and learnt lots of things. I wrote lots of Articles on Silverlight and published in my Blog. Today I decided to share you some of the best practices you should follow while doing development in WPF/Silverlight. Hope, this will help you guys while writing XAML codes. Read and try to strict with the guidelines whenever you are modifying your XAML.


Feedbacks are always appreciated. Hence, don’t forget to leave your comments at the end. If you have any more points, please share it here. I will review them and add those here.


Update [08-Aug-2010]: On popular demand, I updated this post with some explanation on “Why?”.

Published by on under .Net | CodeProject