If you are using Windows 10 PC or any Mobile device, you might already know about the Quick Action buttons. In latest Windows 10 Mobile update for Windows Insiders, Microsoft added the functionality to customize the quick action panel as per your need.
You can now add/remove any action button or rearrange them. In this quick blog post, we will discuss about it with a set of screenshots.
In recent Windows 10 Mobile Insider Preview Build 14322, Quick Action functionality has been improved. Now onwards, we can add, remove or rearrange the quick action buttons as we want. You can do so by following the below steps.
Open the settings app either from your Start screen or from the app list. Now click on the “System” settings menu item, followed by “Notifications & actions”. This will navigate you to the notifications & actions settings page, as shown in the below screenshot:
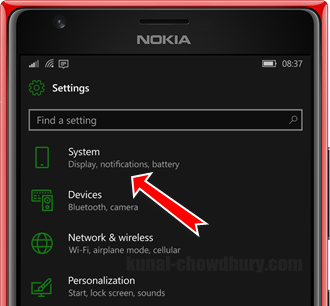
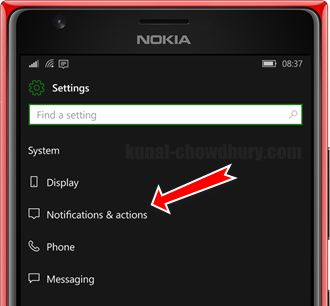
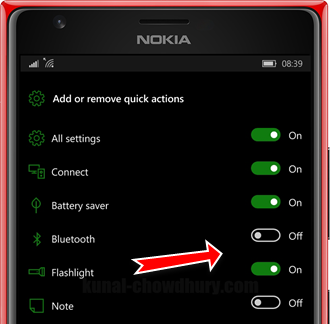
This will list all the Quick Action items/buttons, those are available in your quick action navigation panel. You can customize them as per your need. As shown in the below left screenshot, you will find the “Add or remove quick actions” option in the screen. When you click this option, you will be redirected to the screen as shown below (right screenshot):

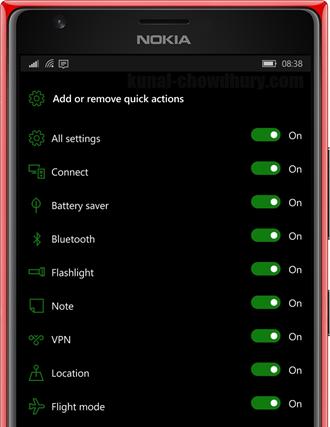
This screen lists all the quick action items/buttons available in your device. You can add or remove them to or from the quick action navigation panel. By toggling the item On or Off (as shown below), you can add or remove any quick buttons.
This changes will be available on the panel immediately. You can also rearrange the buttons. This can be done in two different ways. First one is a bit tricky but if you understand, it will be easy for you to manage. Let’s go with an simple example. Suppose in the below screenshot, we have “Connect” button before the “All settings” button. If you want to switch the position between them, you have to first turn OFF the “Connect” button from the panel. The “All settings” button will immediately move to the position where “Connect” was there. Now toggle ON the “Connect” button to be placed in the Quick Actions navigation panel. This will now be placed at the last position, which is now just after the “All Settings” button.
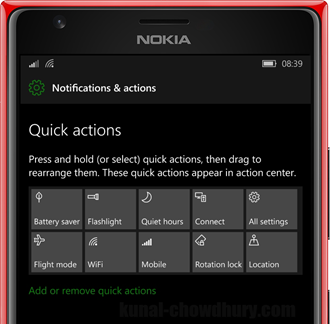
Second one is simple enough to reposition. In the settings pane above, just tap the button that you want to reposition and then drag it to the place where you want to set it. This way, you can rearrange/reposition the buttons in the screen very easily. Both the same applies to Windows 10 for PC. Follow the same steps as mentioned above. Here’s the screenshot for you to refer:
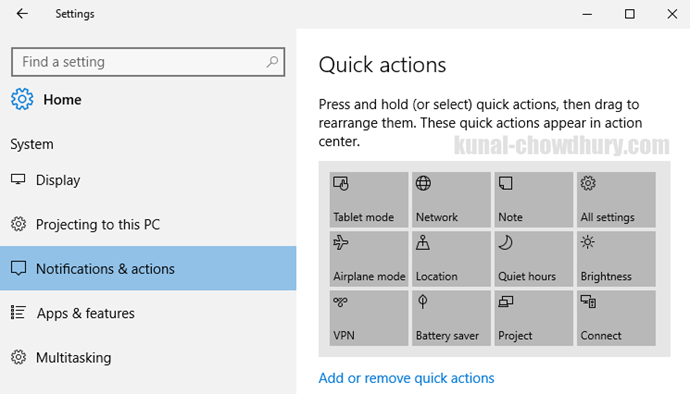
I hope that the post was easy enough for you to understand how to add/remove any buttons in the Quick Actions panel or rearrange them as per your daily need. Don’t forget to read out my other posts hosted on this blog. Stay tuned for more tips & tricks on this series. Happy reading!


